
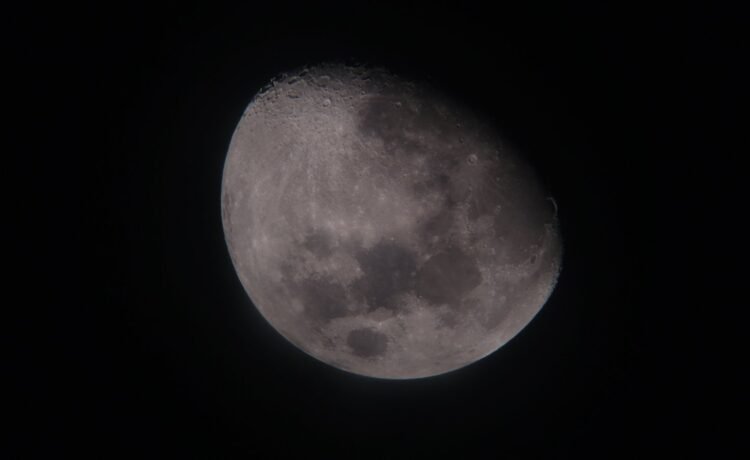
You are standing under a sky full of stars. So you lift your phone, tap the shutter, and get a black rectangle.
Maybe one grey smudge. Nothing else.
That happens to almost everyone. But it is not the phone’s fault, and it is fixable in about ten minutes.
This guide shows you how to photograph Milky Way with phone gear you already own. First, you will learn the four things that matter.
Then you will get the exact settings. Also, you will learn where and when to point it. Finally, you will see the mistakes that ruin most first tries.
Yes, Your Phone Can Do This
Phone cameras have changed a lot. So a shot that needed a proper camera ten years ago is now within reach.
The sensor is still small, which sets a ceiling. Still, night mode does clever work in software.
NASA has a guide for exactly this. It says you can take surprisingly good shots by practising a few basic techniques (Source: NASA, 2026 — Astrophotography With Your Smartphone).
So the skill is mostly setup. Because the phone can already gather the light, your job is to hold it still and tell it where to look.
One thing matters more than any of that. Your sky has to be dark.
From a city, a long exposure just records more orange glow. Meanwhile, from a dark site, the same phone records stars.
So fix the location first. Then worry about settings.
This trips up a lot of people. They buy a tripod and a clip-on lens.
Then they shoot from a rooftop in town. So the gear was never the issue.
A cheap phone at a dark site beats a new one in the city. Every time.
Q: Do I need a new phone for this?
A: Not necessarily. Because night mode has been common for several years, most recent phones manage it. So an older phone still works if you can set a long exposure manually.
The Four Things That Actually Matter
NASA breaks smartphone astrophotography into four techniques. Get these right and everything else is detail.
One: steadiness. Keep the phone completely still, which matters most in low light (Source: NASA, 2026 — Astrophotography With Your Smartphone).
A small tripod is ideal. Still, a rock, a wall or a block of wood does the job (Source: NASA, 2026 — Astrophotography With Your Smartphone).
Two: locked focus. Autofocus struggles in the dark and often shifts mid-shot (Source: NASA, 2026 — Astrophotography With Your Smartphone).
So tap the screen on a bright star, then lock it. Because a locked focus cannot drift, your stars stay as points.
Three: long exposure. Night mode holds the shutter open and stacks the result.
Some phones allow up to 30 seconds in night mode, if you use a tripod (Source: NASA, 2026 — Astrophotography With Your Smartphone).
Four: processing. A small edit afterwards lifts a flat image into a good one.
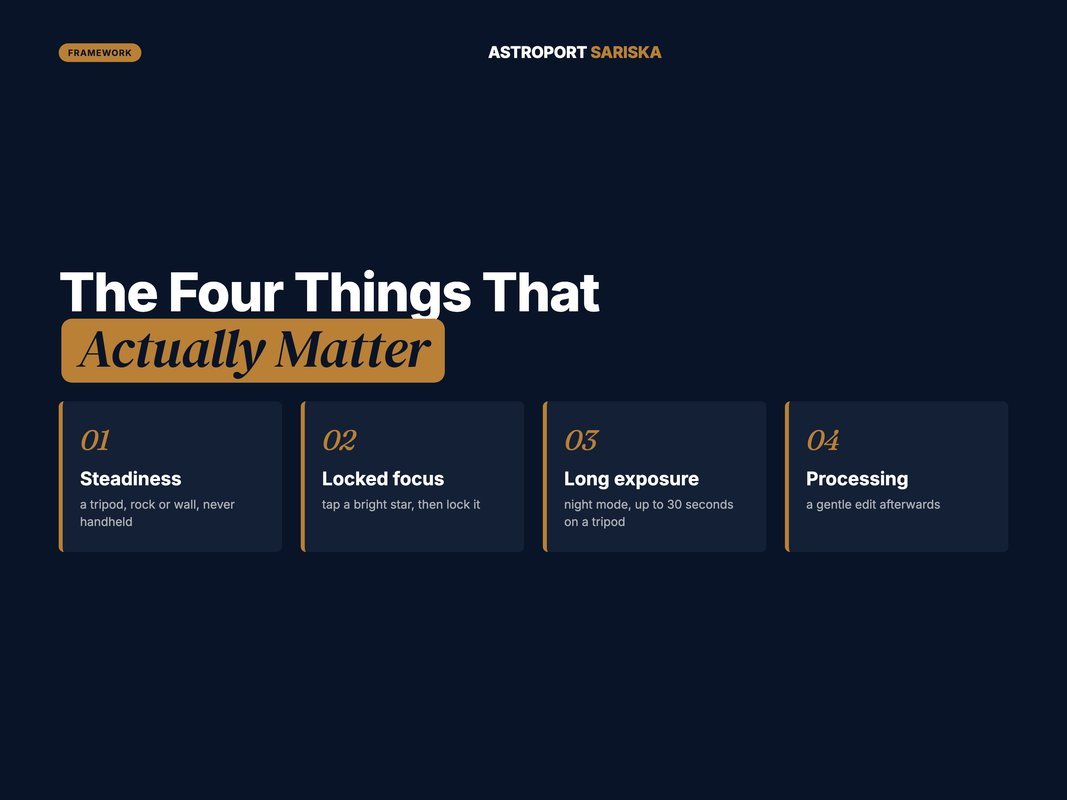
That is the whole framework. So everything below is just how to apply it.
Q: Which of the four matters most?
A: Steadiness, by a wide margin. Because a long exposure records every wobble, a shaky phone ruins the shot before focus even matters.
Settings, Step by Step
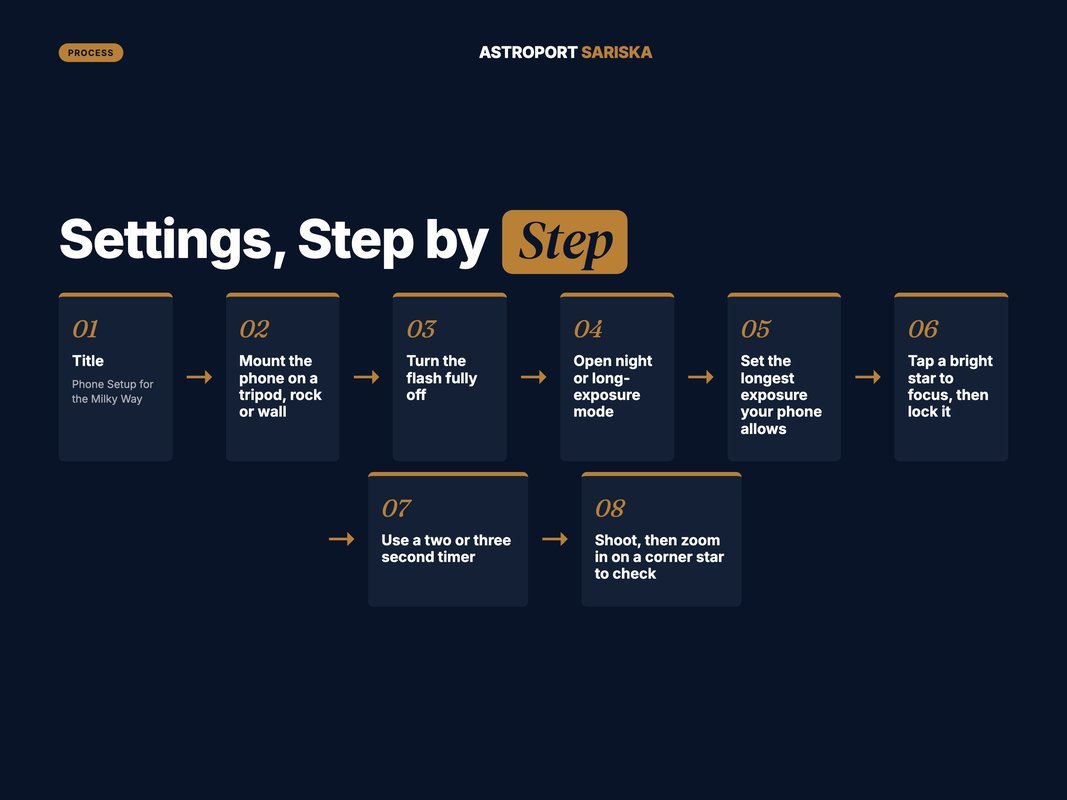
Work through these in order. The whole setup takes a couple of minutes.
-
Mount the phone. First, set it on a tripod, a rock or a wall. Because any movement smears the stars, this comes first.
-
Turn the flash off. Then check it is properly off, not on auto.
-
Open night mode. Next, switch to your phone’s night or long-exposure mode.
-
Set the longest exposure you can. So push it to the maximum your phone allows on a tripod.
-
Tap a bright star to focus. Then look for a focus lock option and use it.
-
Use the timer. Also, set a two or three second delay. Because tapping the shutter shakes the phone, the timer removes that wobble (Source: NASA, 2026 — Astrophotography With Your Smartphone).
-
Shoot, then check the edges. Finally, zoom in on a corner star. If it is a short line rather than a dot, shorten the exposure.
Then repeat with small changes. So shoot a few versions and compare them later.
Change one thing at a time. Otherwise you will not know what helped.
Start with exposure length. Then try a wider lens if your phone has one.
Keep the bad frames for now. They tell you what to fix next time.
Q: Why are my stars small lines instead of dots?
A: Because the Earth turns while the shutter is open. So shorten the exposure until they read as points. Wider lenses tolerate longer exposures than zoomed ones.
Where and When to Point It
The best settings will not save a bad sky. So plan the night before you plan the shot.
Pick a dark site. Skyglow now hides the Milky Way from more than a third of humanity (Source: Falchi et al., 2016 — World Atlas of Artificial Night Sky Brightness).
So you need to be well clear of any city dome. In north India, that usually means several hours of driving.
Pick a moonless night. A bright moon washes the band out completely. Aim within about five days of the new moon.
Pick the right month. The bright core of the Milky Way is only up at night from roughly February to October (Source: EarthSky, 2026 — Milky Way season).
In August it stands highest, due south, a couple of hours after sunset (Source: EarthSky, 2026 — Teapot of Sagittarius).
But August is monsoon season across most of India. So October is usually the better bet, with clear air and the core still up early.
Find the core. Look south for a group of stars shaped like a teapot. So the bright core sits just above its spout.
Add a foreground. A ridge, a tree or a rock gives the frame scale. Because an empty sky reads flat, one dark shape fixes it.
Q: Should I include people in the shot?
A: A single silhouette works beautifully. Still, they must stand very still for the whole exposure. So count the seconds out loud for them.
Phone Photo vs Camera Photo
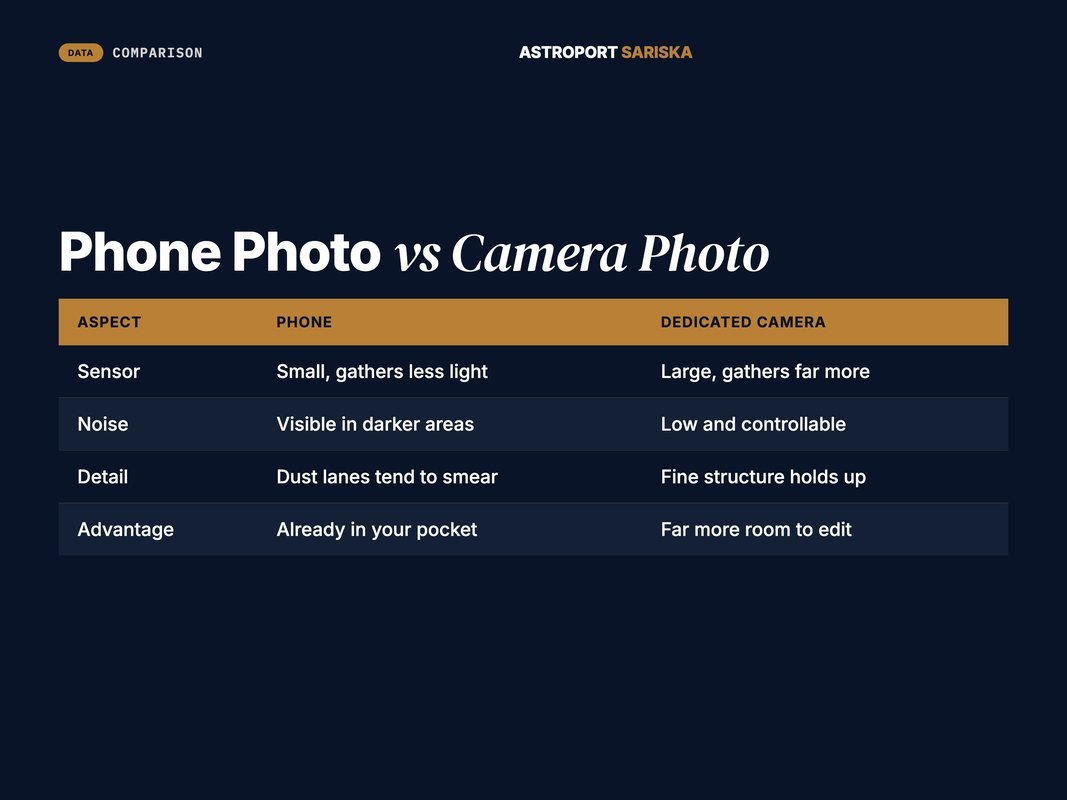
Expectations cause more disappointment here than technique. So here is the honest comparison.
A phone gives you a clear, recognisable Milky Way from a dark site. You will see the band, the brighter core and some structure.
A dedicated camera gives you more of everything. Because the sensor is larger, it collects far more light with less noise.
So the phone image is noisier. Also, fine detail in the dust lanes tends to smear.
None of that makes the phone shot worthless. In fact, it is the one you will actually take, because it is in your pocket.
Most people share one photo anyway. So the phone wins on speed.
It also frees you up. Because setup takes two minutes, you spend the rest of the night looking.
There is another difference worth knowing. Your eyes see structure and depth, while the camera sees colour.
So the photo and the live view are two different experiences. Both are worth having on the same night.
Q: Is it worth buying a cheap clip-on lens?
A: Rarely, for night skies. Because extra glass adds flare and softness, results often get worse. So spend on a tripod instead.
Common Mistakes and Quick Fixes
Most failed shots come from the same short list.
| What went wrong | Why it happened | The fix |
|---|---|---|
| Everything is black | Exposure too short, or sky too bright | Use night mode and a darker site |
| Stars are blurry blobs | Autofocus hunted in the dark | Tap a bright star, then lock focus |
| Stars are short lines | Exposure too long for the lens | Shorten the exposure and reshoot |
| Whole frame is orange | City skyglow, not your settings | Drive further from town |
| Image looks shaky | Shutter tapped by hand | Use the two-second timer |
| Foreground is pitch black | Nothing lit it during the exposure | Wait for moonlight, or accept a silhouette |
| Photo looks flat | No editing done afterwards | Lift contrast gently in any photo app |
Notice the pattern. Four of those seven are about steadiness or focus.
Neither costs money. So both are worth drilling before you travel.
Practise at home first. Point the phone at a streetlight and lock focus on it.
Then you arrive knowing the menus. That saves fumbling in the dark.
So if you only fix two things, fix those. Everything else is a refinement.
Q: How much editing is too much?
A: Stop when it stops looking like the night you saw. Because heavy sliders create colours that were never there, a light touch reads better.
Your Phone Astrophotography Checklist
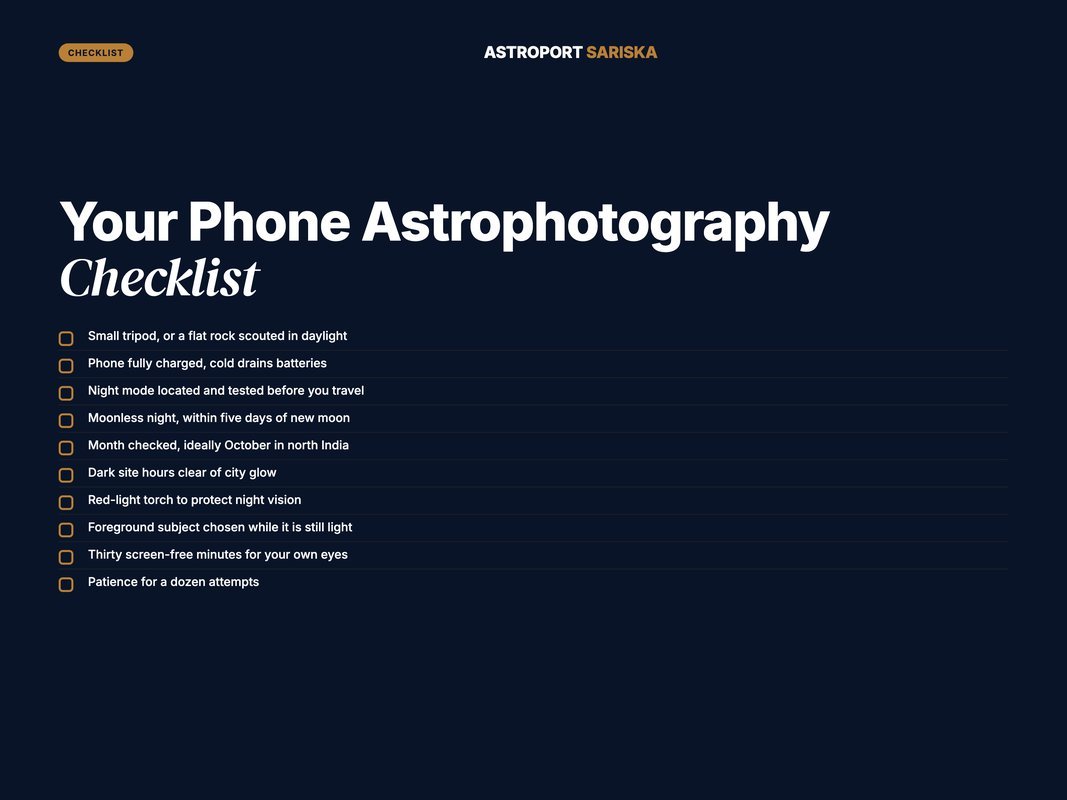
Pack and prepare with this.
- Small tripod, or a flat rock scouted in daylight
- Phone charged fully, since cold drains batteries fast
- Night mode located and tested before you travel
- Moonless night picked, within five days of new moon
- Month checked, ideally October in north India
- Dark site several hours clear of city glow
- Red-light torch, to protect everyone’s night vision
- Foreground subject chosen while it is still light
- Thirty screen-free minutes for your own eyes (Source: NASA, 2026 — How to Find Good Places to Stargaze)
- Patience for a dozen attempts, not one
Also, shoot early in the session. Because your phone screen wrecks your dark adaptation, get the photos done and then put it away.
Q: What is the most common beginner mistake?
A: Shooting from too bright a place. So people blame the phone when the sky is the problem. Because a dark site changes everything, fix that first.
Why Astroport Sariska
Every tip above assumes one thing. You need a sky worth pointing a phone at.
Astroport Sariska is India’s first astronomy resort. It sits at Tehla in the Aravalli hills, beside the Sariska Tiger Reserve in Alwar, Rajasthan.
The drive is about four to five hours from Delhi NCR. So it clears the region’s glow, which is the part your phone cannot fix.
Guests here see thousands of stars on a clear night. Meanwhile, central Delhi offers a couple of dozen.
At that level a phone genuinely works. So the band shows up in a single long exposure, without heavy editing.
There is help on hand too. The resort runs astrophotography sessions alongside its stargazing programme, with resident astronomers and professional telescopes.
Also useful: they know the foregrounds. Because the ridges and rock outcrops here are already scouted, you skip the trial and error.
One timing note. Astronomy activities pause each year from 1 June to 15 August during the monsoon. So aim for October onwards. Plan your stay on a moonless week.
Conclusion
So your phone is probably good enough. The sky above it usually is not.
Fix the location first, then the moon, then the month. Because those three set your ceiling, no setting can rescue a bright sky.
After that, four things do the work. Hold the phone still, lock the focus, run a long exposure, and edit gently.
Expect a noisier image than the ones online. Still, expect a real, recognisable Milky Way.
Shoot a dozen frames. Then put the phone away and just look up. Plan a dark-sky night and take the shot properly.
FAQ
Q: Can a phone really photograph the Milky Way?
A: Yes, most recent phones can. NASA notes that four basic techniques do the work: steadiness, locked focus, long exposure and processing. The bigger limit is your sky, not your phone.
Q: What phone settings do I need for the Milky Way?
A: Use night mode with the longest exposure your phone allows. Lock the focus on a bright star. Then fire the shutter with the timer. Turn the flash off. A tripod lets some phones run night mode for up to 30 seconds.
Q: Do I need a tripod to shoot the night sky on a phone?
A: Effectively, yes. NASA recommends a small tripod, though a rock, wall or block of wood works in a pinch. Any movement during a long exposure smears the stars into short lines.
Q: Why do my night photos come out blurry?
A: Usually because autofocus hunted in the dark, or your hand moved the phone. Tap a bright star to set focus, then lock it so the camera cannot readjust. Use the timer instead of tapping the shutter.
Q: When is the best time to shoot the Milky Way in India?
A: October is the most reliable month in the north. The bright core is up soon after dark, and the air is clear. March to May also works, but only in the pre-dawn hours. Always pick a night near the new moon.
Q: Will the photo look like the ones online?
A: Not quite, and that is normal. Phone sensors are small, so images are noisier and less detailed than those from a dedicated camera. You will still get a clear, recognisable band of the Milky Way from a dark site.
Q: Does light pollution stop phone astrophotography?
A: It is the single biggest factor. From a city, a long exposure simply records the orange glow more brightly. You need a genuinely dark site for the Milky Way to register at all.